Robot Dynamics & Control: Lab - The Robot Kinematics Simulator
What This Lab Is For
The four lectures in this series build the algebra of manipulator kinematics: rigid motions, homogeneous transforms, the Denavit-Hartenberg convention, and the inverse problem. This post is the companion lab — a browser-based simulator where those matrices stop being symbols on a page and start moving an arm.
Read it in about five minutes before the session. Everything below is written against the interface as it appears on screen, so the button and tab names are quoted exactly.
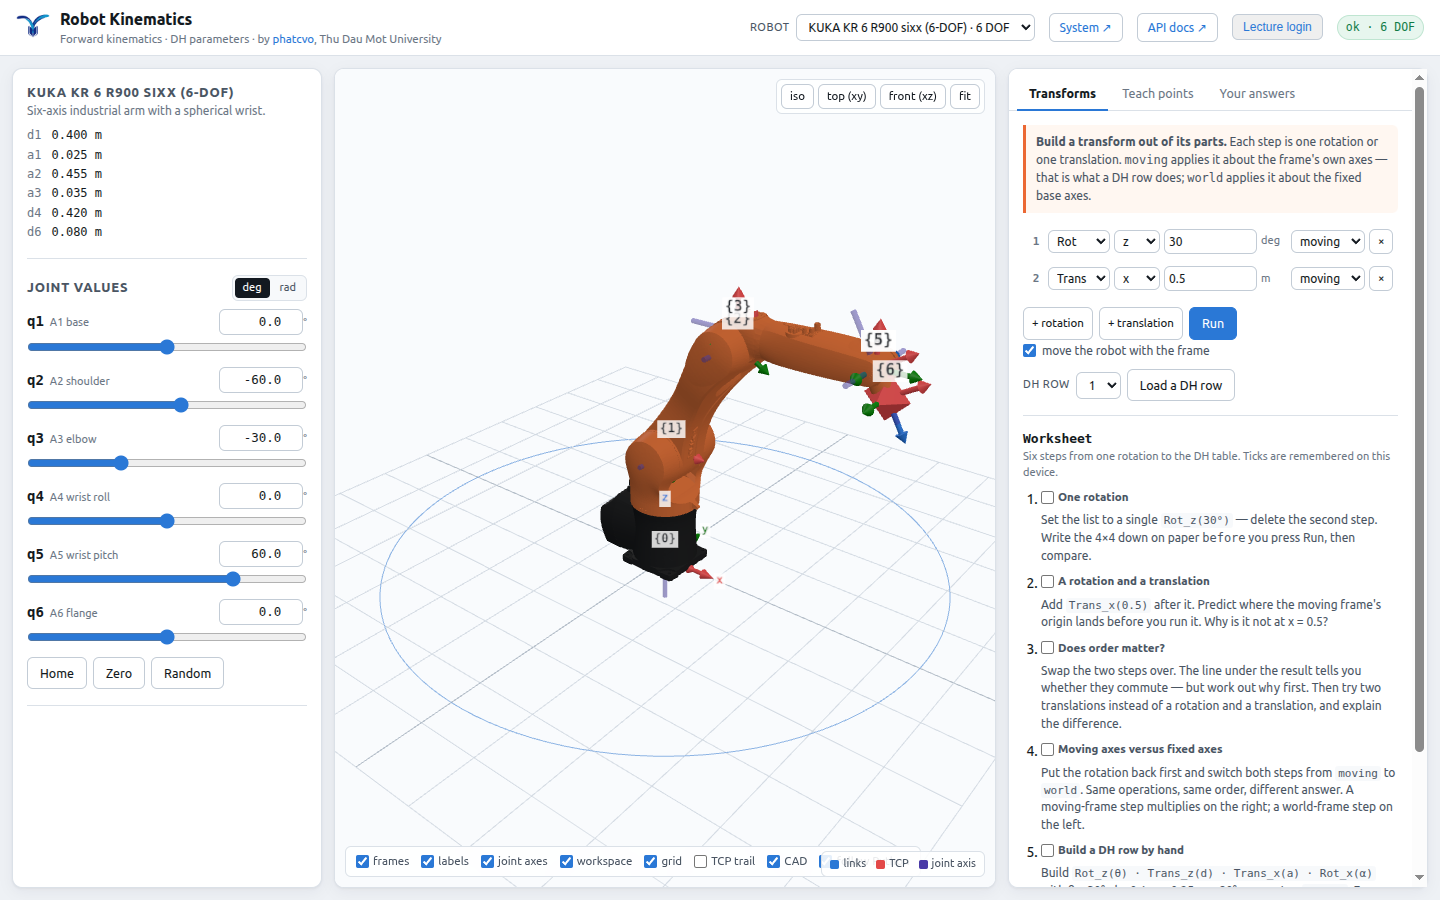
The screen is three columns: left are the joint values, middle is the 3D viewport, right are the three exercise tabs.
Every computation runs on the server. The browser sends joint values and draws what comes back — it computes no matrix of its own. The reference implementation is therefore not in the page source, and no amount of reading the JavaScript will reveal an answer.
That is a deliberate design choice rather than an inconvenience. A kinematics tool that solves the problem in the browser is a tool you can read instead of a problem you can solve.
The Left Column: Robot Selection and Joint Control
The ROBOT selector in the title bar chooses the arm model. The status chip in the top-right corner reads ok once the server is connected; if it turns red, nothing else on the page will work — tell the lecturer.
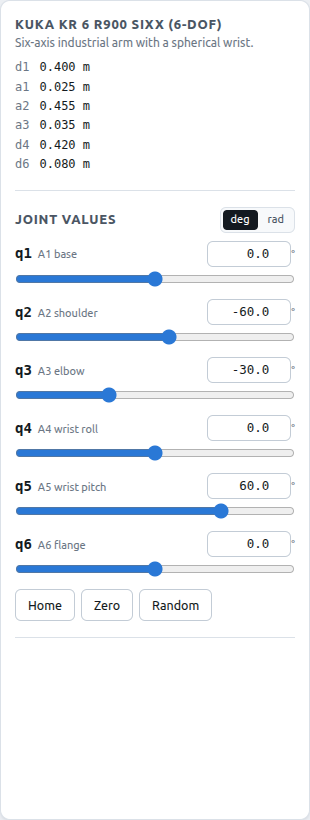
The JOINT VALUES panel for the KUKA KR 6 R900.
- Each joint $q_1 \ldots q_6$ has a slider and a numeric field. Drag the slider or type the number directly; both drive the same variable.
- The deg / rad toggle switches the angular unit. Check which one is active before you copy a number into your working — a factor of $180/\pi$ is the single most common error in this material.
- Home returns the arm to its reference pose, Zero sets every joint to zero, and Random draws an arbitrary configuration. Random is the most useful of the three: it lets you set your own exercises.
Above the panel are the link dimensions ($d_1$, $a_2$, and so on). These are exactly the constants that appear in the DH table of Lecture 3, and they are the numbers you need when you work the problem by hand.
The Middle Column: The 3D Viewport
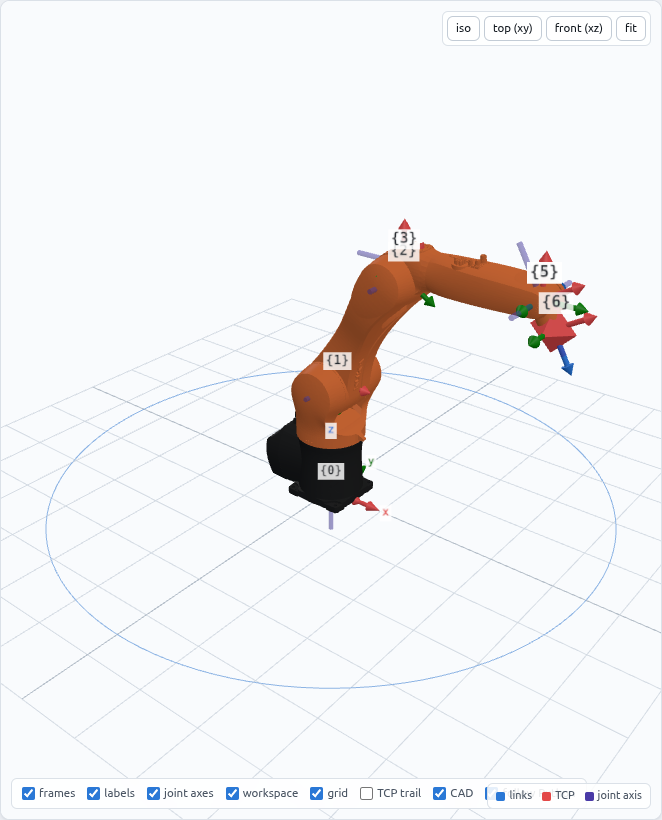
The labels $\{0\} \ldots \{6\}$ are the frames $o_i x_i y_i z_i$ attached to each link.
- Rotate: hold the left mouse button and drag. Zoom: scroll wheel. Pan: hold the right mouse button and drag.
- The buttons in the top-right corner — iso, top (xy), front (xz) — switch the camera; fit frames the whole robot again after an over-enthusiastic zoom.
- The checkbox row toggles the overlays: frames (the coordinate frames), labels, joint axes (the axis each joint rotates about), workspace (the reachable volume), TCP trail (the path the tool point has travelled), echo 3 s (faint red dots that fade over three seconds, showing where the tool point has just been — useful when watching an inverse-kinematics solution land, or a move to a taught point) and CAD (the solid model instead of the wireframe).
Keyboard shortcuts: 1 2 3 switch between the three camera views, and f is the fit button.
TCP (Tool Center Point) is the red point at the end of the arm. Most exercises ask about the position of exactly this point — the translation column of $T^0_n$.
Tab 1: Transforms — Building a Transform From Its Parts
This tab is the lesson that comes before the DH table. Each row in the list is one rotation (Rot) or one translation (Trans) about or along a single axis.
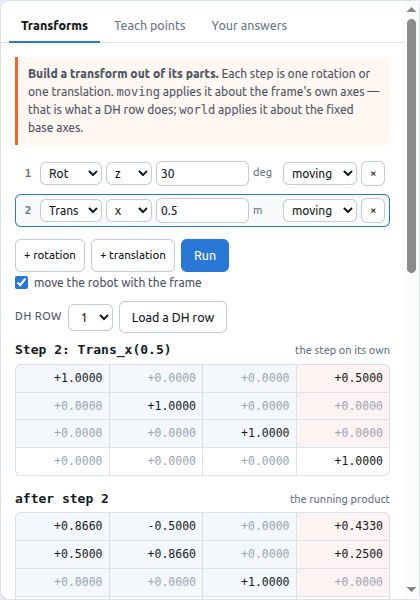
Two steps, the Run button, and the $4 \times 4$ matrix the server returns.
How to use it:
- Add a step with + rotation or + translation; remove one with the × at the end of the row.
- Choose the axis (x, y, z) and type the value — angles in degrees, distances in metres.
- Press Run to evaluate.
The last column of each row is where the confusion lives, and it is the whole point of the tab:
| Setting | Meaning |
|---|---|
| moving | Rotate or translate about an axis of the frame as it currently stands. This is what a DH row does. In matrix terms: post-multiply (multiply on the right). |
| world | Rotate or translate about the fixed axes of the base frame. In matrix terms: pre-multiply (multiply on the left). |
This is the current-frame versus fixed-frame distinction from Lecture 2, made clickable. If the rule “successive rotations about the current frame compose by right multiplication” has never quite stuck, build a two-step sequence here, flip the setting, and watch which way the arm goes.
Does order matter? Yes. Swap the two steps and press Run again — the line under the result will tell you whether they commute. Explain why to yourself before you read it.
The move the robot with the frame checkbox applies the transform to the whole arm rather than to a lone triad, which makes the result far easier to picture. The Load a DH row button loads one row of the DH table as four steps, so you can see that a DH row is nothing more elaborate than
$$ A_i = \operatorname{Rot}_{z,\theta_i} \; \operatorname{Trans}_{z,d_i} \; \operatorname{Trans}_{x,a_i} \; \operatorname{Rot}_{x,\alpha_i} $$Four elementary motions, in that order, all about the current frame. The DH convention is a naming discipline for choosing the frames — it is not a new kind of matrix.
At the bottom of the tab is the Worksheet: six short exercises in increasing order of difficulty. The ticks are remembered on the machine you are working at.
Tab 2: Teach Points — Teaching Positions Like a Real Robot
Industrial manipulators are usually programmed by teaching points: the operator jogs the arm to where it needs to be, presses save, and plays the sequence back. This tab reproduces that workflow.
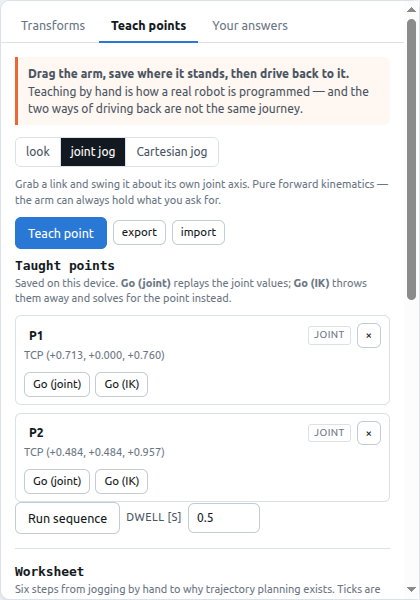
Two taught points, each with two ways of returning to it.
Three modes at the top of the tab:
- look — moves the camera only, never the robot.
- joint jog — drag a link and it rotates about its own joint axis. This is forward kinematics: you supply the angles, the software reports the position.
- Cartesian jog — drag the tool point to where you want it in space. This is inverse kinematics: you supply the position, the software has to find the angles.
Press Teach point to store the current pose. Each stored point has two buttons, and the difference between them is the substance of the whole tab:
| Button | What it does |
|---|---|
| Go (joint) | Replays the stored joint values. Reaches exactly one pose, identically every time. |
| Go (IK) | Discards the joint values, keeps only the Cartesian coordinates, and solves the inverse problem for the angles. It may well arrive in a different pose from the one you taught, because several joint configurations reach the same point. Sometimes there is no solution at all. |
Do this one yourself. Teach a point, press Go (joint), then press Go (IK), and watch. That is the reason the inverse problem is harder than the forward one: forward kinematics is a function evaluation, and inverse kinematics is a search for solutions that may be multiple, or may not exist. Being able to explain that difference means you have understood half of this course.
With two or more points stored, Run sequence drives the arm through them in order, pausing dwell seconds at each. The export / import buttons write and read the point list as JSON — worth using before you change machines, because points are stored only in the browser you taught them in.
Tab 3: Your Answers — Submitting and Being Marked
You do the calculation on paper (or in code), type the result here, and the server marks it. The key property: the platform never gives you the answer — it only tells you how far from it you are.
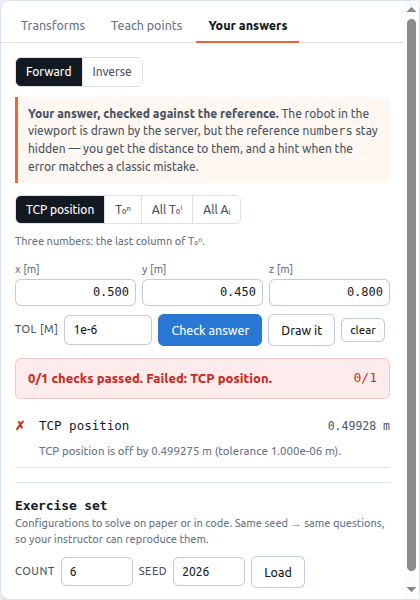
A wrong answer: the platform reports a 0.50 m discrepancy without stating the correct figure.
- Choose the direction: Forward (given joint angles, find the pose) or Inverse (given the pose, find the joint angles).
- Choose the form of the answer: TCP position (three numbers — the translation column of $T^0_n$), T₀ⁿ (the full $4 \times 4$ matrix), All T₀ⁱ or All Aᵢ (one matrix per frame, or one per DH row).
- Type the numbers and press Check answer.
- TOL [m] is the accepted tolerance. The default of 1e-6 is strict; if you rounded while working by hand, loosen it to 1e-3 — that is honest, not a shortcut.
- Draw it overlays your answer on the actual robot. When only one link is wrong, this makes it obvious at a glance which one.
- When the error matches a classic mistake — degrees confused with radians, a link omitted, a sign flipped — the platform says so.
The Exercise set section at the foot of the tab generates a problem set: pick a count and a seed, then press Load. The same seed always produces the same questions, so a lecturer can reissue an identical set — use the seed you were given.
Suggested Order, and Troubleshooting
The three tabs are arranged in the order they should be worked:
- Transforms — understand what a transform is assembled from.
- Teach points — see how forward and inverse kinematics differ at the same point in space.
- Your answers — compute it yourself and check.
| Symptom | Cause and remedy |
|---|---|
| Status chip is red | The server is down or the network dropped. Reload; if it persists, tell the lecturer. |
| The robot will not move when dragged | You are in look mode on the Teach points tab. Switch to joint jog or Cartesian jog. |
| Taught points have disappeared | Points live in this browser only. Use export before switching machines. |
| A correct answer is marked wrong | Check the unit (degrees or radians) and loosen TOL [m] if you rounded. |
This is the demo platform link arm-sim-web